| Create themes for your kbfx 0.4.9 |
| So you want to create your own themes for kbfx
0.4.9? Well this is the right place then. The guide is done in a simple manner and we hope that you will easily and simply create themes for kbfx 0.4.9. If you don't like something in this guide, please feel free to contact us at IRC on irc.freenode.org on channel #kbfx |
| mask.png |
| mask.png is the image which decides the size and the shape of the menu. In this theme guide we will follow the default menu-size, which also comes to you preinstalled with kbfx. The default mask size is: width=300px height=369. The mask.png image should have alpha buffer. The transparent parts in mask.png (so rounded corners, for example) are parts that are transparent in the menu. This image should not be changed if you are going to follow this guide. |
| bg.png |
| bg.png defines the viewable area of the menu and
is not visible to the user, but it's really important that it's there. If you
are going to follow this guide and use this menu size, then you should not
change or do anything with this image. Just leave it there as it is. The size of this image is by default: height=271px width=300px. |
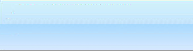
| topbg.png |
|
Name: topbg.png Height = 58 px Width = 300 px |
|
|
| Let's start to create the first image for our new kbfx
theme. The name is topbg.png and it should be 300px large and 58 px high. Well - if we want the menu to look a little better and more organized then it's recommended that you draw a line at the bottom of that image with size 1 px, just like you see on this image. So you are done? Then let's continue... |
| dudebox.png |
|
Name: dudebox.png Height = 51 px Width = 51 px |
|
|
| The dudebox image is the background pic, where your personal
image is presented on. To get a better looking effect it's often good if you draw a 1px border around that image. |
| menu_top_image_person.png |
| Name: menu_top_image_person.png Height = 48 px Width = 48 px |
|
|
| This image is used for theme's default personal image. |
| rhstile.png |
| Name: rhstile.png Height = 22 px Width = 106 px |
|
|
| This image is displayed as the background of the categories, on the left in the menu, as you know. This is important, so you need to pay attention. As you can see on the image. There is a line at the bottom and on the right hand. Those two lines separate the categories. Those two lines give a much better look to the menu. But since you are the designer of your menu, you can decide if you want them there or not. Try and see. |
| rhshovertile.png |
| Name: rhshovertile.png Height = 22 px Width = 106 px |
|
|
| Rhshovertile.png is the hover image for the rhstile. If you are making an rhstile.png image with the line at the bottom and to the right, remember to also draw the line on the right. The image size of this image is the same as rhstile.png |
| tilenormal.png |
|
Name: tilenormal.png Height = 51 px Width = 193 px |
|
|
| tilenormal.png is displayed, where your applications are. As you can also see on the image is, that there is also a 1 px line at the bottom. This is because this will separate those different applications in a very nice way. But feel free to make your own experiments. |
| tilehover.png |
|
Name: tilehover.png Height = 51 px Width = 193 px |
|
|
| tilehover.png is the hover image of the tilenormal.png. It should have the same size as tilenormal.png (don't forget to draw the line at the bottom to separate applications). |
| separator.png |
| Name: separator.png Height = 27 px Width = 193 px |
|
|
| separator.png is the background image of the submenu categories. |
| botbg.png |
| Name: botbg.png Height = 36 px Width = 183 px |
|
|
| botbg.png is displayed in the listbox at the bottom to the left. So what do you need to think of here? Well, as you can see, there is also a line at the top and at the bottom which are 1px. The one on the bottom is white, but you can chose any color you want. You need to draw that line at the top, because it separates the bottom part of the menu from the rest. There should not be a line to the left and to the right. |
| logout.png |
| Name: logout.png Height = 36 px Width = 57 px |
|
|
| Time to pay attention again! This is the logout button image, and if you have made a line at the top of the image in logbg.png, then you should also create one here. So this image should have a 1px line to the left, top and right. And this is very important since those lines separate the logout button and the lock button. But it's your theme and if you are making a special theme, maybe there should not be any line at all. Just remember, if you have drawn a white line at the bottom in botbg.png, then there should be also one on this image. |
| logouthover.png |
| Name: logouthover.png Height = 36 px Width = 57 px |
|
|
| This is the hover image of the logout button. If you have drawn lines to the left, top and right in logout.png, there should be lines here as well. And if you have the white line at the bottom, there should be a white line here as well. |
| lock.png |
| Name: lock.png Height = 36 px Width = 61 px |
|
|
| This is the lock image for our menu and as you can see, there is also one line here at the top and a white line at the bottom. If you download the images lock.png, logout.png and botbg.png and put them in one line, you will see the entire effect of those lines. There should be no line to the left and the right hand . |
| lockhover.png |
| Name: lockhover.png Height = 36 px Width = 61 px |
|
|
| Lockhover.png is the hover image of the lock.png image. If you have drawn the lock image with 1px line at the top and the bottom, you should also draw the same lines here. |
| find.png |
| Name: find.png Height = 21 px Width = 22 px |
|
|
| We use find.png to display the find box and it's very important that it has a transparent background. The image should contain alpha buffer. |
| preview.png |
|
Name: preview.png Height = 205 px Width = 170 px |
|
|
| The image should be a snapshot of the working KBFX theme. It is used in the configuration application in order the user to see what the theme will look like. |